| 13.3. The "XMLmind XSL Customizer" application | ||
|---|---|---|
 | 13. The "Customize Document Conversion Stylesheets" dialog box |  |
| 13.3. The "XMLmind XSL Customizer" application | ||
|---|---|---|
| | 13. The "Customize Document Conversion Stylesheets" dialog box | |
The "XMLmind XSL Customizer" application is a companion application embedded in XMLmind XML Editor and XMLmind XSL Utility.
This application is invoked by clicking the XSLT stylesheet button found in XMLmind XML Editor and XMLmind XSL Utility. It allows to modify a custom XSLT stylesheet created by clicking the XSLT stylesheet button found in XMLmind XML Editor and XMLmind XSL Utility.
A custom XSLT stylesheet created this way merely imports the stock XSLT stylesheet. Example:
<?xml version="1.0" encoding="UTF-8"?>
<?stylesheet-label ACME Corp. Styles?>
<xsl:stylesheet version="2.0" xmlns:xsl="http://www.w3.org/1999/XSL/Transform">
  <xsl:import href="dita-config:xsl/fo/fo.xsl"/>
  <!-- REDEFINE PARAMETERS AND ATTRIBUTE-SETS HERE -->
</xsl:stylesheet>
"XMLmind XSL Customizer" is not an XSLT editor. However it allows to:
add or change attributes in some of the attribute sets supported by the XSLT stylesheet,
change the value of some of the parameters supported by the XSLT stylesheet,
and this, without prior knowledge of XSLT.
XSLT stylesheets are often (but not always) parameterized by the means of:
Parameters. DocBook XSL stylesheet example:
<xsl:param name="paper.type">USletter
</xsl:param>
Attribute sets. DocBook XSL stylesheet example:
<xsl:attribute-set name="monospace.verbatim.properties"<xsl:attribute name="wrap-option">no-wrap</xsl:attribute>
</xsl:attribute-set>
The name of the attribute set is " | |
This attribute set includes two other attribute sets: | |
This attribute set directly contains attribute | |
This attribute set directly contains attribute |
An attribute set can contain any attribute. However attribute sets are mainly used in XSLT stylesheets which generate XSL-FO. The XSL-FO intermediate file generated by the XSLT stylesheet is then processed by programs such as Apache FOP, RenderX XEP, Antenna House XSL Formatter, XMLmind XSL-FO Converter, etc, in order to create the deliverable: PDF, PostScript, RTF, .docx, .odt, etc. The attribute sets are used in this case because they are the only way to influence the look of the deliverable. Such attribute sets contain standard XSL-FO presentation attributes (very similar to the CSS properties): color, font-family, line-height, margin-left, etc.

Create a customization of an existing XSLT stylesheet. This button displays the standard file chooser dialog box allowing to choose the XSLT stylesheet for which a customization is to be created.

Open a custom XSLT stylesheet previously created by clicking the button. This button displays the standard file chooser dialog box allowing to choose the custom XSLT stylesheet to be opened.

Close currently opened XSLT stylesheet.

Save the changes made to currently opened XSLT stylesheet.

Save currently opened XSLT stylesheet to a different file.

Display this online help.

Close "XMLmind XSL Customizer" main window.
![[Tip]](images/tip.svg) | |
Because "XMLmind XSL Customizer" is an (embedded) application and not a modal dialog box, you can keep it open while converting an XML document in XMLmind XML Editor or in XMLmind XSL Utility. This allows to experiment with attribute sets and parameters until you are satisfied with the result of the conversion. |
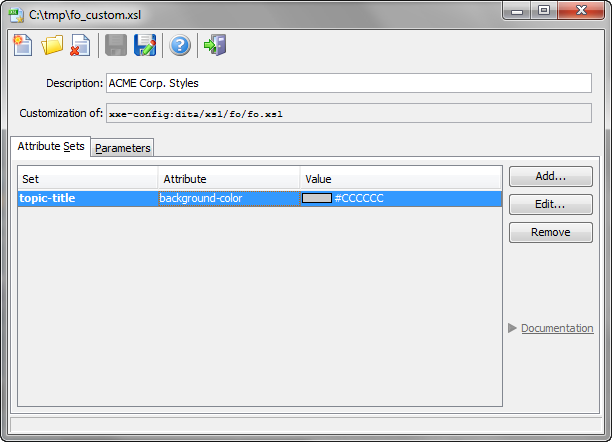
Short description of the currently opened custom XSLT stylesheet. XMLmind XML Editor requires a custom XSLT stylesheet to have such description.
Read-only text field: URI of the stock XSLT stylesheet for which the currently opened XSLT stylesheet is a customization.
Add an attribute to one of the attribute sets supported by currently opened XSLT stylesheet.
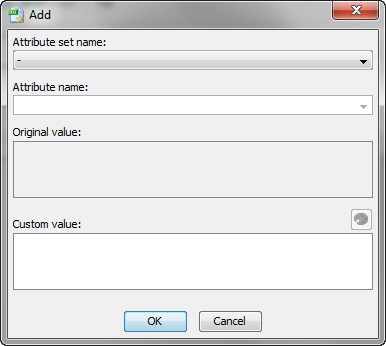
This button displays the Add/Edit attribute dialog box. How to use this dialog box is described in the example below.
![[Note]](images/note.svg) | |
XMLmind XSL Customizer is designed for users who cannot “program in XSLT”. These users are expected to enter literal values, not XSLT elements, in the Custom value field. For example, they are expected to enter something like: 20pt as the value of the <xsl:value-of select="$body.font.master * 2"/> <xsl:text>pt</xsl:text> However, if the user happens to know what she/he is doing and nevertheless enters one or more XML nodes in the Custom value field, then XMLmind XSL Customizer will ask her/him to confirm that this is really what she/he wants and make it work. |
Modify currently selected attribute.
This button displays the Add/Edit attribute dialog box.
Remove currently selected attribute.
Start the web browser and make it display the page containing the documentation about currently selected attribute. This button is disabled (grayed) when such documentation is not available. For now, only the DocBook XSL Stylesheets provide some documentation for their attribute sets.
Set one of the parameters supported by currently opened XSLT stylesheet.
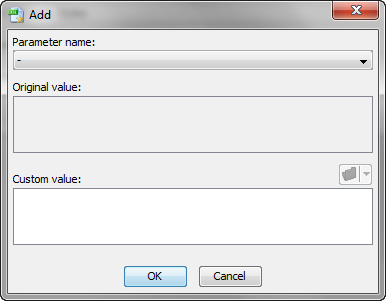
This button displays the Add/Edit parameter dialog box. How to use this dialog box is described in the example below.
| |
XMLmind XSL Customizer is designed for users who cannot “program in XSLT”. These users are expected to enter literal values, not XSLT elements, in the Custom value field. For example, they are expected to enter something like: 40pt as the value of the <xsl:value-of select="$body.font.master * 4"/> <xsl:text>pt</xsl:text> However, if the user happens to know what she/he is doing and nevertheless enters one or more XML nodes in the Custom value field, then XMLmind XSL Customizer will ask her/him to confirm that this is really what she/he wants and make it work. |
Modify currently selected parameter.
This button displays the Add/Edit parameter dialog box.
Remove currently selected parameter.
Start the web browser and make it display the page containing the documentation about currently selected parameter. This button is disabled (grayed) when such documentation is not available.
This is specified by adding attribute background-color=#CCCCCC to the attribute-set called topic-title.
Select the Attribute Sets tab.
Click . This displays the Add/Edit attribute dialog box.
In the "Attribute set name:" combobox, select topic-title.
In the "Attribute:" combobox, type "background-color" or select this commonly used attribute from the drop down list.
The "Original value:" read-only text field remains empty, indicating that the stock XSLT stylesheet does not specify attribute topic-title/background-color.
In the "Custom value:" field, type "#CCCCCC".

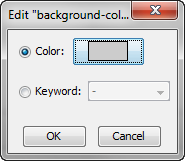
Or more simply, click  "" and use the
 background-color editor to specify a light gray color.
Click to close the dialog box.
This is specified by setting parameter base-font-size to 12pt.
Select the Parameters tab.
Click . This displays the Add/Edit parameter dialog box.
In the "Parameter name:" combobox, select base-font-size.
The "Original value:" read-only text field changes to "10pt", which is the value of parameter base-font-size specified in the stock XSLT stylesheet.
In the "Custom value:" field, type "12pt".
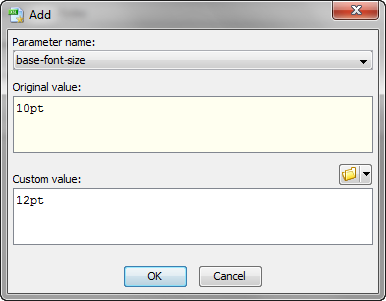
Click to close the dialog box.
| |  | |
| 13.2. Reference |  | 14. The "Install Add-ons" dialog box |