| 10. The "Save Selected Element as Template" dialog box | ||
|---|---|---|
 | Chapter 9. Dialog boxes |  |
| 10. The "Save Selected Element as Template" dialog box | ||
|---|---|---|
| | Chapter 9. Dialog boxes | |
This dialog box is displayed by menu item + → . Basically, it allows the user to specify a label for the newly created element template.
Giving a label to an element template is needed to support different templates for the same element type. For example, in a DocBook document, select a table element and use + → to label it as "L1". Then select another table element and use the same menu item to label it as "L2". This gives you two table element templates, one called "L1" and the other called "L2".
The label of an element template must be a valid NMTOKEN. It cannot contain whitespace.
The element name and label of a template may be identical to the element name and label of one of the existing templates. This allows to replace an existing template by a new one.
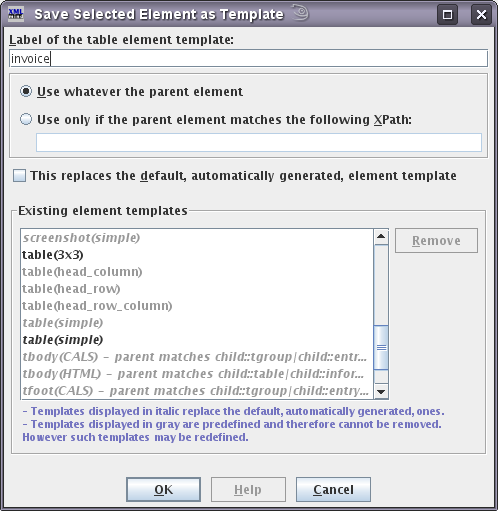
In the above screen shot, we can see that:
The user is creating a new table element template called "invoice".
After creating this template, it will be displayed in the "Existing element templates" list as "table(invoice)", "table" being the element name of the template and "invoice" being its label.
Previously, the user has created another table element template labelled "3x3".
Previously, the user has replaced predefined "table(simple)" template by a "table(simple)" template of its own.
| |  | |
| 9.2. Removing a previously defined document template |  | 10.1. Advanced options |